
Before you begin:
Make sure you have:
- A supported Pearl device running firmware 4.24.6 or later
- A computer connected to the same local network as your Pearl device
- An active Audinate account
- Dante Controller (which includes Dante Activator), installed on your computer
- An active Dante add on for your Pearl device
Useful Links:
1: Purchase the Dante Add-on
Note: A separate Dante purchase is only required for:
- Pearl Mini and Pearl Nexus devices purchased before May 2026
- Pearl 2 devices purchased before August 2026
If you are unsure whether Dante was included with your device, continue to Step 2. Pearl will install the add on automatically if your device is eligible.
To purchase Dante:
1. Open a web browser and sign in to the Pearl Admin panel.
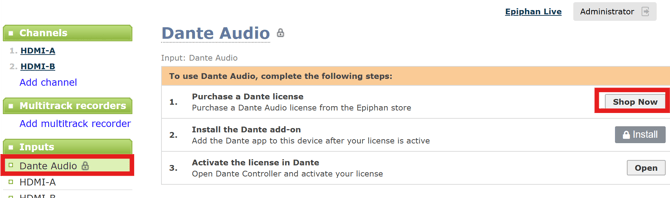
2. Open the Dante Audio page.
3. Select Shop Now.
4. Complete the purchase.
2: Install the Dante Add-on
After purchasing the add on, or if Dante was included with your Pearl:
1. In the Pearl Admin panel, go to Configuration > Firmware Upgrade.
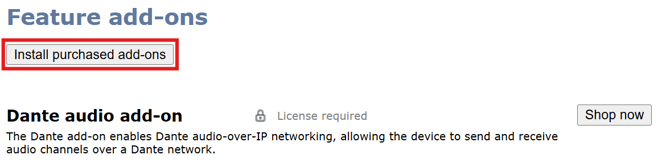
2. Select Install purchased add ons.
3. Follow the prompts to install the available add on.
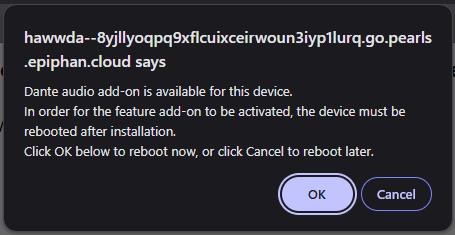
After Pearl restarts:
4. Go to Apps.
5. Locate the Dante application.
6. Select Install.
7. Wait for installation to reach 100%.
Important: Reboot Pearl again after the Dante application finishes installing. This reboot is required before Dante can be activated and used.
If the add on does not appear or installation fails, confirm that Pearl can access the internet using the (Connectivity Test[link to connectivity test instructions]).
3: Retrieve the Pearl MAC Address
You will use Pearl's MAC address to identify the device in Dante Activator.
In the Pearl Admin panel:
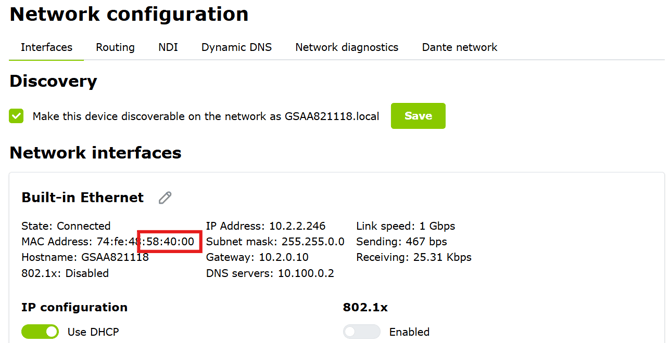
1. Go to Configuration > Network.
2. Locate the MAC address for the network interface.
3. Note the last six characters of the MAC address.
You can also find the MAC address from Pearl's front screen under Settings > System Status.
4: Activate the Pearl License
1. Open Dante Controller on a computer connected to the same network as Pearl.
2. Open Dante Activator.
3. Under New Activations, locate your Pearl device.
Pearl can be identified by matching the last six characters shown in Dante Activator with the MAC address recorded in the previous step.
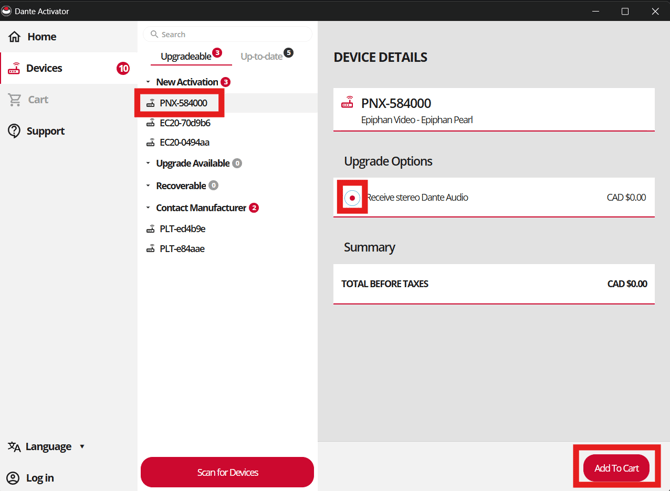
4. Select the Pearl device.
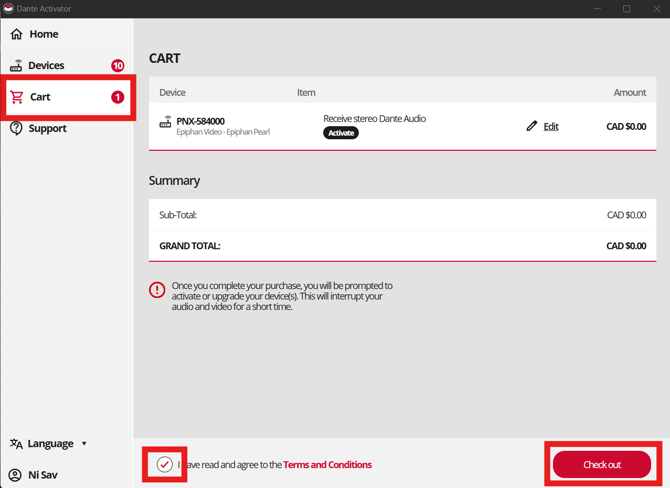
5. Add the Dante licence to your cart.
6. Sign in to your Audinate account when prompted.
7. Complete the checkout activation process.
5: Configure Dante Inputs on Pearl
After activation completes:
1. Refresh the Pearl Admin panel.
2. Open the Dante Audio page.
3. Confirm that the new Dante audio inputs are available.
4. Select the network interface that Dante should use:
-
- Built in Ethernet
- USB Ethernet
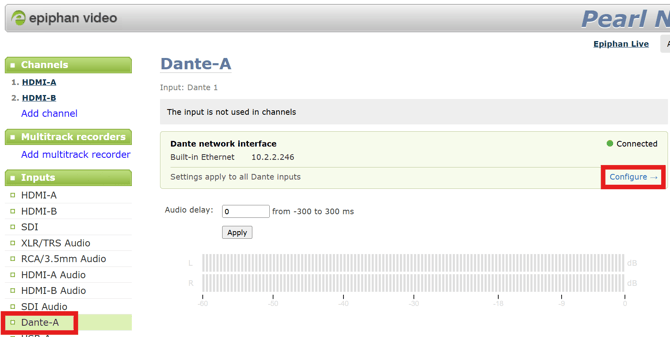
You can now add Dante inputs to your Pearl channel layouts in the same way as other audio sources.
6: Route Audio in Dante Controller
Return to Dante Controller.
1. Open the Dante network routing view.
2. Locate the transmitting Dante device.
3. Locate Pearl as a receiving device.
4. Select the appropriate routing.
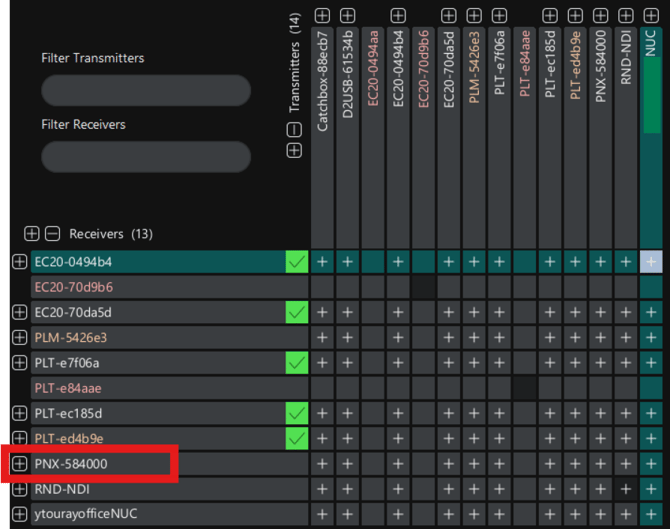
Once the subscription is established, audio from the selected Dante transmitter is routed to Pearl.
Verify your Dante audio
To confirm that the setup is working:
1. Check that the subscription in Dante Controller shows as successfully established.
2. Open the relevant Pearl channel or audio source.
3. Confirm that Pearl's audio meters respond to the incoming Dante signal.
Your Pearl device is now ready to use Dante audio for recording, streaming and channel layouts.
Note: Pearl only displays audio metering for audio sources that have been added to a channel layout.