Table of Contents
- Overview
- Getting to know your Pearl device
- Pairing to Epiphan Edge
- Configuring your Pearl device
- Pair, update, and automatically configure your entire fleet
- Finetune your CMS settings
Overview
The Epiphan Pearl's remote recorder integration with CMS platforms like Panopto, Kaltura, YuJa, and Opencast provide a seamless multi-source recording and webcasting (not available via Opencast) experience. Connect multiple video and audio sources directly to the rear panel of a Pearl device, or ingest IP based streams. The web-based Admin panel interface lets you set up Pearl devices to the exact specifications required and register as a remote recorder with a CMS platform. Once registered, the Pearl device is available for scheduled, recurring, and unscheduled ad-hoc events.
Pearl device firmware 4.17.2 or newer is required to use Epiphan Edge. If an older firmware version is installed:
- See Register your Pearl devices
- Then follow the instructions on this page to manually or automatically download and install the latest and compatible firmware
Prerequisites
- Admin access to a CMS platform
- Admin access to a Pearl device
- A active premium subscription to Epiphan Edge
- Admin computer with a web browser connected to the same network as at least one Pearl device in your fleet
- A network with internet access
- Preferred: network that uses Dynamic Host Configuration Protocol (DHCP)
Getting to know your Pearl device
Before You Begin
Pearl devices come preconfigured with two channels (Pearl Nano only supports one channel). Each channel is treated as a separate video encoding instance, like having multiple recording and streaming devices in one box with audio for multiple source recordings and webcasts (Pearl Nano only supports one channel). The two preconfigured channels (one for Pearl Nano) are setup with auto-detection to get you started quickly - simply connect one or more sources to start capturing video!
Video sources and channels
Video sources connect directly to the video input ports on Pearl’s rear panel or via IP setup using the Pearl Admin panel. Simply connect your video sources.
Pearl devices support:
| Recommended Inputs | Recommended Channels |
| Pearl Nano | up to two video sources (two physical or one physical + one IP) | One 1080p60 or one 4K30 channel |
| Pearl Mini | up to three video sources | Three 1080p30 channels (or equivalent) |
| Pearl Nexus | up to three video sources | Three 1080p30 channels (or equivalent) |
| Pearl-2 | up to three video sources (High Bandwidth NDI limited to four sources) | Six 1080p30 channels or 1 4k30 channel (or equivalent) |
Audio Sources
Audio sources connect directly to the audio input ports on Pearl’s rear panel, or you can simply use the embedded audio from a video source. Make sure you select the same audio sources on the layout for each channel using the Admin panel.
Network ports
By default, Pearl devices use DHCP to automatically obtain an IP address over an Ethernet network. Simply connect Pearl’s RJ-45 port and/or connected USB to Ethernet** adapter to your local network. Ensure at least one network interface has access to the Internet.
**USB to Ethernet adapter Pearl Admin panel access is not supported. See Pearl Dual NIC / Helpful Information
Network settings
You can configure Pearl’s network settings using the web-based Admin panel, enable 802.1x network security, configure LDAP, and more. If configuring entire fleet, you can use configuration presets to apply settings across many devices, requiring you to configure just one device manually in many cases.
Pairing to Epiphan Edge
In this section you will:
- Create pairing USB stick
- Get pairing USB stick ready for pairing
- Pair your Pearl device to Epiphan Edge
Methods to a Pearl device to Epiphan Edge
There are several ways to access your Pearl’s Admin panel or pair the device to Epiphan Edge.
| Automatic pairing using a USB stick |
| Automatic pairing using Admin panel |
| Manual pairing using the HDMI display (Pearl Nexus only) |
| Manual pairing using display or Admin panel (Pearl Nexus not supported) |
This guide will use Automatic pairing using USB stick. See Pair, unpair, and delete a device to learn and use the other methods. See Pearl Nexus Quick Start if you're using a Pearl Nexus.
Below is a helpful video that speaks to this following process
HDMI Device Info page is only supported by Pearl Nexus
Create pairing USB stick
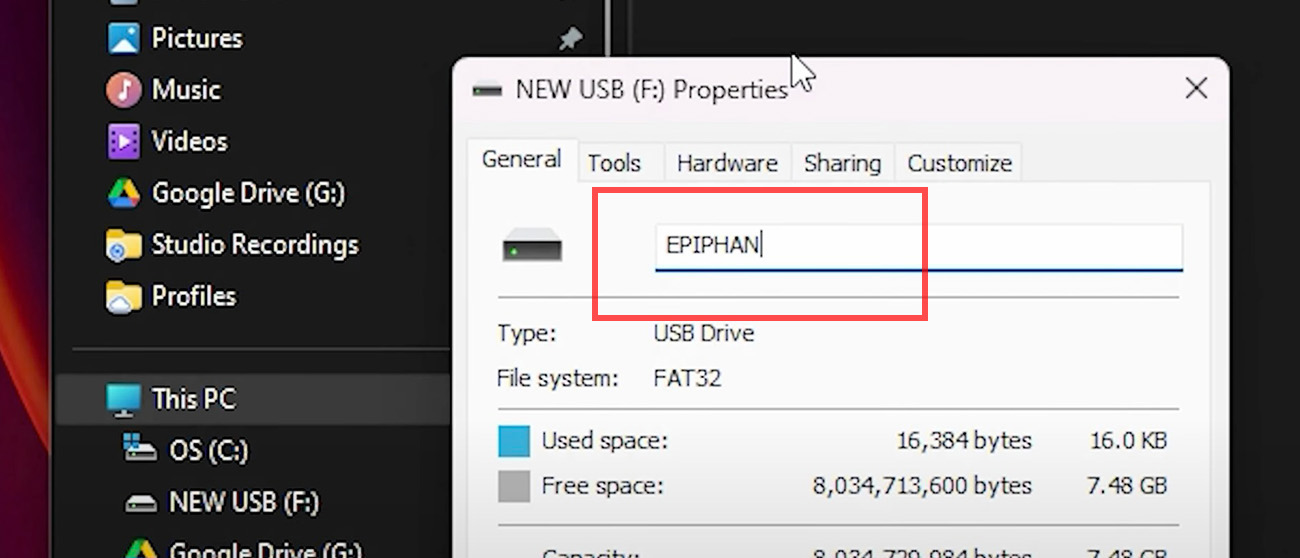
- Start by formatting a USB stick to exFAT, FAT32, ext2, or ext4.
- Insert the USB stick into your computer and rename the USB drive to EPIPHAN (case-sensitive).
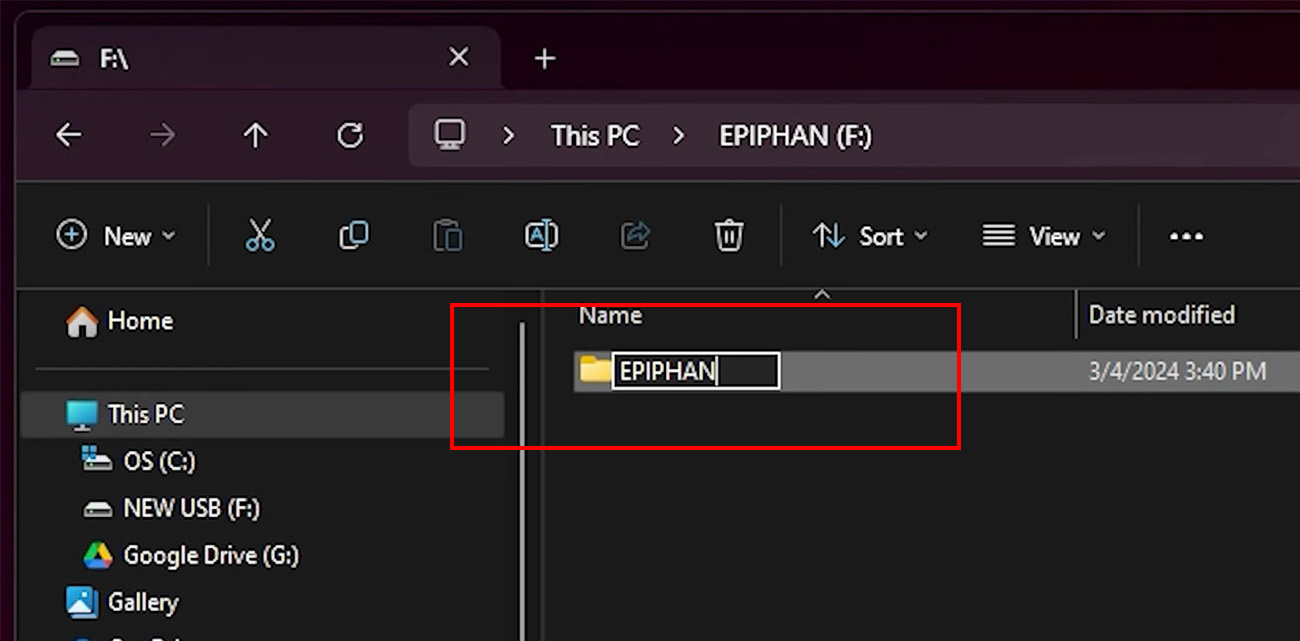
- Create a new folder on the USB stick. Name it EPIPHAN (case-sensitive).
Get USB stick ready for pairing
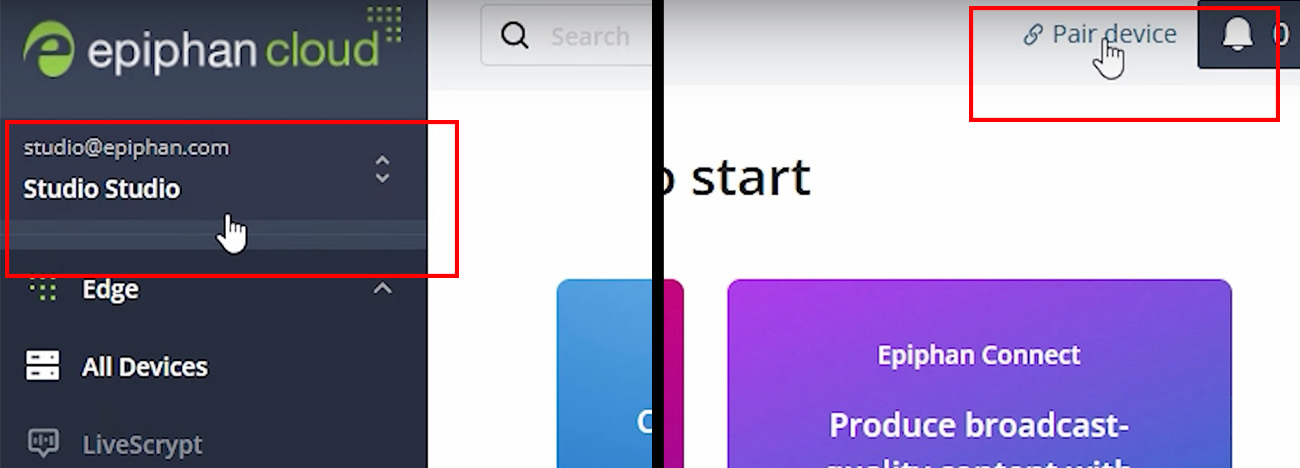
- Navigate to or create your Epiphan Cloud account and choose the team you’d like to pair your Pearl to.
- Click Pair device at the top right.
- Click the Get pairing file button at the bottom. The pairing file should start downloading automatically.

- Copy the downloaded file to the EPIPHAN folder** on the USB stick.
**Failing to place the pairing file in the EPIPHAN folder will cause pairing to fail during the next steps - Eject the USB stick from your computer.
Pair your Pearl device to Epiphan Edge
- Insert the USB stick into the front of the Pearl device (rear USB port for Pearl Nano) to pair the device automatically.
A successful pairing is indicated in the following ways:**
**You can use the Pearl network diagnostic tools from the display or admin panel, or for Pearl Nexus, see network status via the HDMI output (by default) if you think your network is encountering an issue. See Diagnostic Tools Pearl-2 or Pearl Mini, Pearl Nano, or Pearl NexusPearl Model Successful Pairing Unsuccessful Pairing Pearl Nano Epiphan Edge settings on display or Pearl Admin panel show paired team name Epiphan Edge settings on display or Pearl Admin panel show a pairing code Pearl Mini Epiphan Edge settings on display or Pearl Admin panel show paired team name Epiphan Edge settings on display or Pearl Admin panel show a pairing code Pearl Nexus Using the front LED indicators a steady blue light is seen for some seconds Using the front LED indicators a flashing red light is seen for some seconds Pearl-2 Epiphan Edge settings on display or Pearl Admin panel show paired team name Epiphan Edge settings on display or Pearl Admin panel show a pairing code - Once successfully paired, navigate or log into your Epiphan Cloud account and click "all devices" under Epiphan Edge on the left side bar.

- For more detailed information, enable "Detailed view" near to the top of Epiphan Edge

You will see your first paired Pearl device. Rename the Pearl device by clicking on the device name then press enter after making a change.
Configuring your Pearl device
In this section you will:
- Configure your Pearl device (best practice/typical setup)
- Register Pearl device with CMS platform
- Create Configuration Preset and upload it to Epiphan Edge team
Pearl device Configuration (best practice/typical setup)
Typically, CMS events are predominantly isolated recordings and streams of audio and video in separate channels. For example, three video sources connected to a Pearl Nexus - one video source (auto tracking camera, professor camera, etc.) is the primary source while the other two video sources (document camera, room PC, etc.) are the secondary sources.
This might look like this: So in this example, the CMS events operated by this Pearl device can deliver up three recordings and streams (depending on event, CMS settings, and chosen CMS). If this were a Pearl-2, up to six recordings and streams can be delivered.
We recommend to always associate the audio of the person speaking in the event to the primary video source when configuring your channel(s) in the Pearl WebUI.**
This might look like this:
**See Setup your Pearl encoder and Setup a Pearl Channel (translates well to other Pearl devices)
Register Pearl device with CMS platform
- Log into the Pearl Admin panel via Epiphan Edge, clicking the "Admin login" button

- Navigate to Configuration, then CMS

- Choose your CMS platform and click "Apply"

Depending on your selection, you will need the following bits of information for the CMS platform, normally provided via the CMS platforms Web UI. For CMS specific instructions, click the name of the CMS platforms in the following chart
CMS Platform Required Fields Leave these fields blank (till after configuration preset creation) Kaltura -Service URL
-Partner ID
-Administrative secret or -Application tokenResource name Panopto Service URL
Registration keyDevice name YuJa Service URL
Authentication token
Username type
User IDDevice name Opencast Service URL
Username
PasswordDevice name Epiphan Edge No required fields N/A - Configure your CMS settings (leaving the Device/Resource name blank) and press Apply or Register Device button (depending on chosen CMS) at the bottom of the CMS page. The status of the registration should change.
This might look like this:
Create Configuration Preset and upload it to Epiphan Edge team
- Navigate back to Epiphan Edge, click on your paired Pearl device, then click "Presets"

- Click "Create a configuration preset"

- Name the configuration preset and click create.

- Upload the configuration preset to the Team presets by clicking "Upload"

Depending on your setup, you can deselect groups of settings in the preset. For example, if you only wanted to apply Network settings from one device to another, but not any other settings like channels, inputs, etc, you could deselect these when you create the configuration.
Once a Configuration Preset is created, you cannot deselect included settings when applying from Epiphan Edge.
Pair, update, and automatically configure your entire fleet
In this section you will:
- Pair your entire fleet
- Register your Pearl devices
- Update your Pearl devices
- Apply a Configuration Preset across entire fleet
Pair your entire fleet
Pearl device firmware 4.17.2 or newer is required to use Epiphan Edge.
Now you are ready to pair the rest of your devices to Epiphan Edge! See Pair your Pearl device to Epiphan Edge and simply:
- Insert the USB stick in Pearl
- Confirm pairing was successful
- Repeat for the next device.
Register your Pearl devices
It is highly recommended to register and update your Pearl devices to the latest firmware for future compatibility, security, and feature updates.
- Navigate to Epiphan's Product Registration form and fill out the form.
- After you register your device(s) and if you receive a message from the Epiphan website to check your email, please check your junk and filtered email for a confirmation email.**
- Confirm the email
If you don't receive an email in 10 minutes, reach out to support@epiphan.com for assistance
-
Open your list of serial numbers in Notepad++ and make sure each number is on its own line.
-
Select the entire list by pressing
Ctrl + A. -
Open the "Replace" dialog by pressing
Ctrl + H. -
In the "Find what" field, enter
\r\n(or just\nif the list uses line feeds only). -
In the "Replace with" field, enter
,(comma followed by a space). -
Enable Regular Expression search mode at the bottom of the dialog.
-
Click "Replace All" to replace each newline with a comma and space.
Your list will now be comma-separated on a single line!
**If you ordered your Pearl devices direct from Epiphan and you are trying to register more than 40 at a time, you can reach out to support@epiphan.com for some additional assistance
Update your Pearl devices
You are required to register your Pearl devices before being able to update via Epiphan Edge or the Pearl Admin panel.
- Navigate to Epiphan Cloud and click the select all devices button

- At the bottom right of Epiphan Cloud, click the firmware upgrade button

- Click "Update"

- All your Pearl devices will update. Wait for them all to come back online.
It can take up to 24 hours for a Pearl device to check if it is registered.
Apply a Configuration Preset across entire fleet
Configuration Presets can only be applied to the same model of Pearl device is was created; a Pearl Mini configuration cannot be applied to a Pearl Nexus.
- Navigate to Epiphan Cloud
- If applying a configuration preset across multiple different models of Pearl devices, click Filters then the model you will do first.

- Click the select all devices button

- Click the "Apply preset" button bottom right of Epiphan Cloud

- Choose the preset you uploaded to the Team presets and click apply

Finetune your CMS settings
In this section you will:
Define a resource/device name
It is very common for Pearl devices pairing with a CMS platform to be named according to the room/location it is operating
- Log into the Pearl Admin panel via Epiphan Edge, clicking the "Admin login" button
- Navigate to Configuration, then CMS

- Under the Registration section on the CMS page, provide a unique name in the resource/device name field

- Click Apply at the bottom of the CMS page
If you change your resource/device name, sometimes called "remote recorder" name from the CMS platform, this change will not update on the Pearl device. All name changes should only occur from the Pearl CMS configuration page.
Modify other CMS settings
Each CMS platform has its own unique settings that can be adjusted from the Pearl device. For more information, see: