
Table of Contents
- Overview
- Getting to know your Pearl device
- Configure your Pearl device and Echo360
- Register your Pearl device with Epiphan servers
- Install Echo360 application and register Pearl device with Echo360
- Deploy Epiphan Devices with Configuration Presets
- Modify other CMS settings
- Delete Echo360 integration
Overview
The Epiphan Pearl's capture appliance integration with Echo360 provides a seamless multi-source recording experience. Connect multiple video and audio sources directly to the rear panel of a Pearl device, or ingest IP based streams. The web-based Admin panel interface lets you set up Pearl devices to the exact specifications required and register as a capture appliance with Echo360. Once registered, the Pearl device is available for scheduled, recurring, and unscheduled ad-hoc events.
At scale, it is recommended to use Epiphan Edge to monitor and manage Epiphan devices. For some features a premium Edge team is required.
You can explore Epiphan Edge here
Prerequisites for Pearl/Echo360 integration
- Pearl device is registered to Epiphan servers
- Pearl device firmware is version 4.24.5 or newer
- Admin access to Echo360
- Pearl device has storage installed (for Echo360 app)
- Admin access to a Pearl device
- Admin computer with a web browser connected to the same network as at least one Pearl device in your fleet
- A network with internet access
- Preferred: network that uses Dynamic Host Configuration Protocol (DHCP)
Getting to know your Pearl device
Pearl Nano does not support Echo360 integration. It is not possible to use a Pearl Nano with Echo360.
Before You Begin
Pearl devices come preconfigured with two channels. Each channel is treated as a separate video encoding instance, like having multiple recording and streaming devices in one box with audio for multiple source recordings and livestreams. The two preconfigured channels are set up with auto-detection to get you started quickly. Simply connect one or more sources to start capturing video!
Video sources and channels
Video sources connect directly to the video input ports on Pearl's rear panel or via IP. The recommendations below are specific to Echo360 integration.
Pearl devices support:
| Recommended Inputs | Recommended Channels |
| Pearl Mini | up to three video sources | up to three 1080p30 channels (or equivalent) |
| Pearl Nexus | up to three video sources | up to three 1080p30 channels (or equivalent) |
| Pearl-2 |
up to six 1080p video sources* |
up to four 1080p30 channels |
*Pearl-2 supports up to six (6) 1080p video sources which can be encoded in up to four (4) 1080p30 channels for the Echo360 integration.
Audio Sources
Audio sources connect directly to the audio input ports on Pearl's rear panel, or you can simply use the embedded audio from a video source. Make sure you select the same audio sources on the layout for each channel using the Admin panel.
Network ports
By default, Pearl devices use DHCP to automatically obtain an IP address over an Ethernet network. Simply connect Pearl's RJ-45 port and/or connected USB to Ethernet** adapter to your local network. Ensure at least one network interface has access to the Internet.
**See Pearl Dual NIC / Helpful Information.
You can configure Pearl's network settings using the web-based Admin panel, enable 802.1x network security, configure LDAP, and more. If configuring an entire fleet, you can use Configuration Presets to apply settings across many devices, requiring you to configure just one device manually in many cases.
Configure your Pearl device and the Echo360 integration
In this section we will discuss:
- Best practice and typical setup
- How to Register Pearl device with Epiphan servers
- How to Install Echo360 application and register Pearl device with Echo360
Best practices and typical setup
Typically, events are predominantly isolated recordings and streams of audio and video in separate channels. For example, three video sources connected to a Pearl Nexus, each being their own dedicated recording.
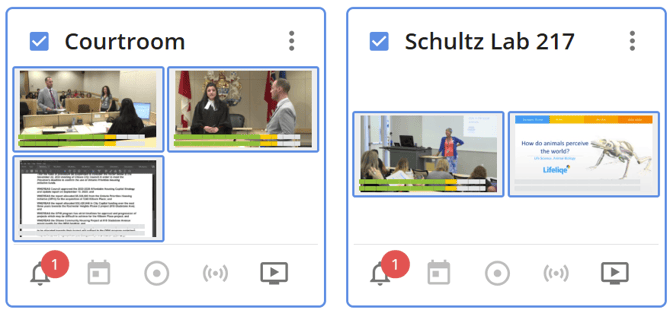
This might look like this for a Pearl Nexus via Epiphan Edge: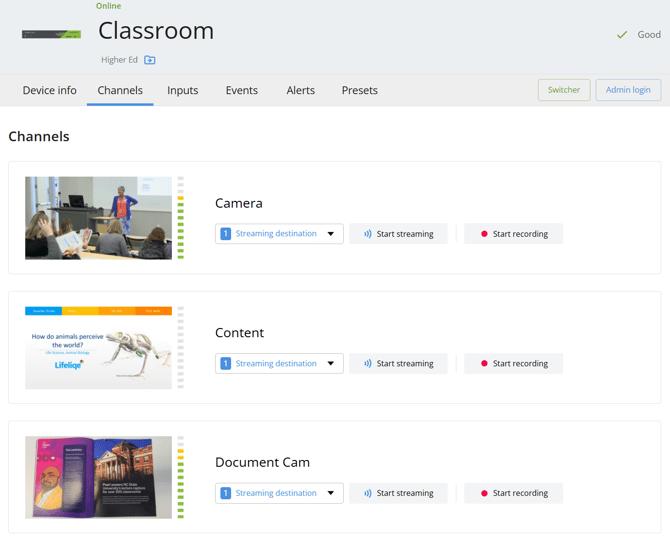
In this example, the events operated by this Pearl device can deliver up to three recordings to Echo360. If this were a Pearl-2, Echo360 supports up to four channels.
We recommend always associating the audio of the person speaking in the event to the primary video source when configuring your channel(s) in the Pearl Admin panel.**
This might look like this: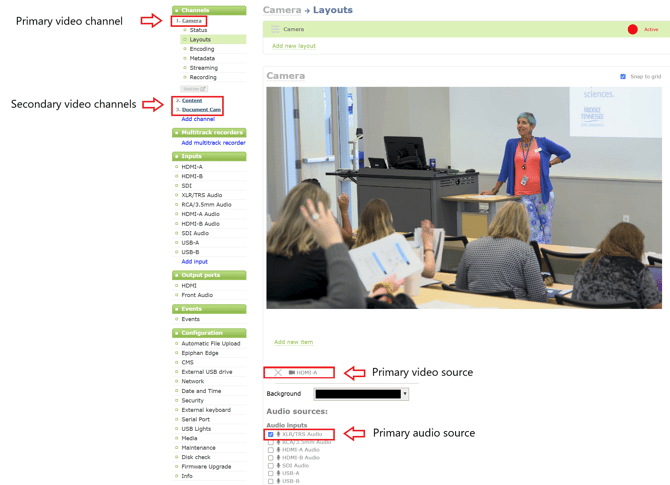
- Primary video channel: Camera
- Secondary video channels: Content, Document Cam
- Primary video source: HDMI A
- Primary audio source: XLR/TRS Audio]
**See the Pearl Basics video series for more help
Register Pearl device with Epiphan servers
It is required to register your Pearl device with Epiphan servers and update to at least firmware 4.24.5. If the Pearl device is not updated or registered to the Epiphan servers, application containers which Echo360 uses for the integration cannot be downloaded.
- Navigate to Epiphan's Product Registration form and fill out the form.
- After you register your device(s) and if you receive a message from the Epiphan website to check your email, please check your junk and filtered email for a confirmation email.
- Confirm by clicking the link in the email.
- Upgrade the firmware by clicking the banner at top of Pearl Admin panel, selecting devices in Edge and bulk updating, or individually in Edge, clicking through into the device.
If you don't receive an email in 10 minutes, reach out to support@epiphan.com for assistance.
If you cannot download and install the firmware for whatever reason, navigate to "Firmware Upgrade" in the Pearl Admin panel and click "Check for Updates"
For Air-gapped networks, current firmware can be found on our Support pages.
Install Echo360 application and register Pearl device with Echo360
- Log in to the Pearl Admin panel via Epiphan Edge, clicking the Admin login button or log in to the Pearl locally
- Navigate down to Apps
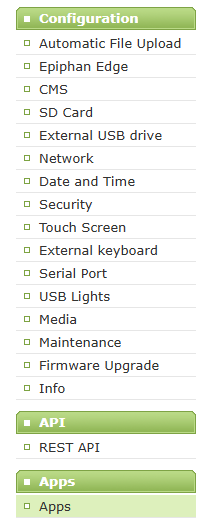
- On the Apps page click Install next to Echo360
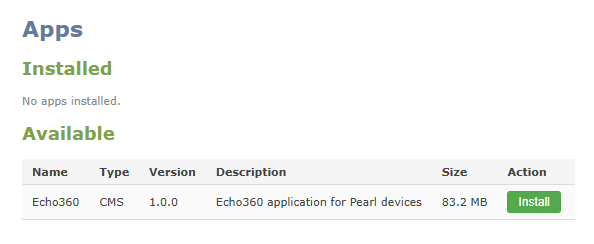
- After the Echo360 container finishes installing, navigate to Configuration, then CMS

- In Choose CMS select Echo360 and click Apply
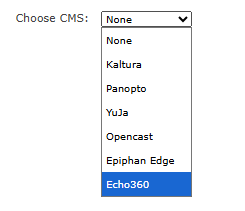
After selecting Echo360 the app will load and you will be presented with an Echo360 box where you can enter your Echo360 Client ID and Client Secret.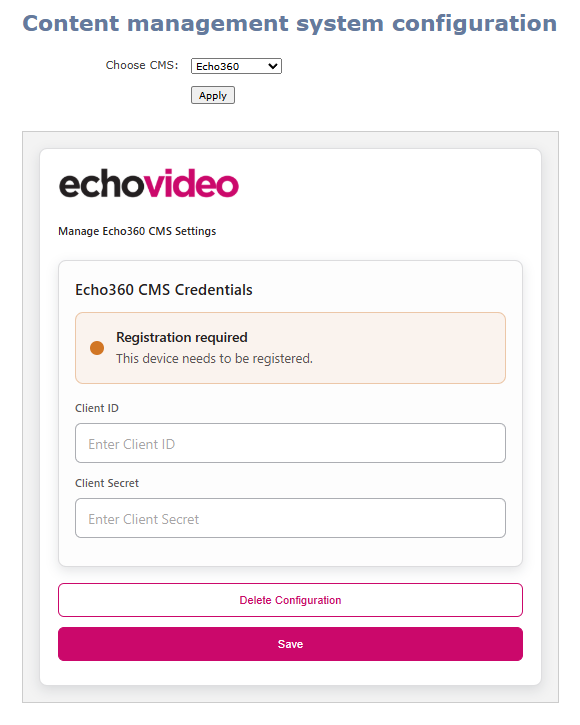
- Once you've entered the correct information and clicked Save your Pearl should now be paired with Echo360.
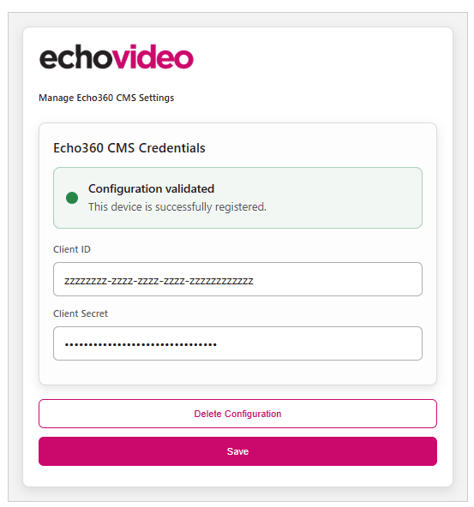
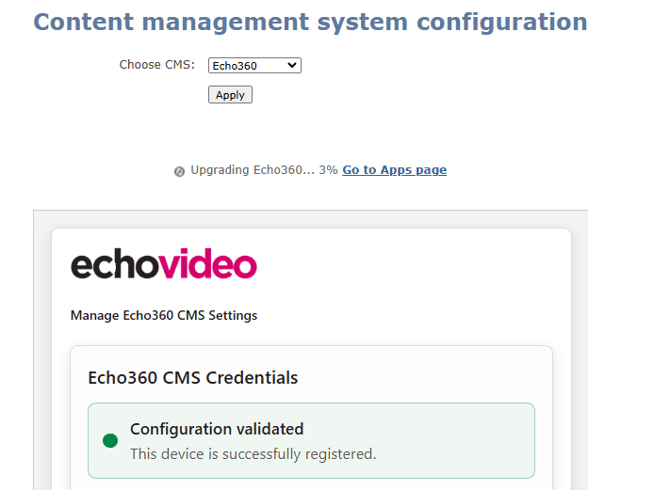
- You may see the Echo360 application update
Deploy Epiphan Devices with Configuration Presets
Epiphan provides tools that make deploying, monitoring, and managing fleets of Epiphan devices, small and large, easy and straightforward.
In this section we will cover how to:
Create and apply Configuration PresetsIt's possible through the use of Configuration Presets, either through Epiphan Edge, the Admin panel, or a USB drive, to quickly configure multiple Pearl devices to use Echo360.
If using Epiphan Edge, a premium Edge team is required in order to apply Configuration Presets and see your Echo360 event calendar
The process, no matter the method, works like this:
- Create a Configuration Preset
- Transfer (download/upload) Configuration Preset to your chosen method of application
- Apply the Configuration Preset to other devices of the same model
We generally recommend deselecting System, Network, and Epiphan Edge when creating and applying a Configuration preset to other devices. You can read more about configuration preset groups here in the user guide.
Creating and applying Configuration Preset using Epiphan Edge (premium required)
- Log in to Epiphan Edge.
- Navigate to All Devices under Epiphan Edge on the left side bar.
- Choose the device you want to create the Configuration Preset from.
- Click the Presets tab.
- Click Create a configuration preset.

- Name the preset and choose the groups of settings you wish to include.

- Click Create.
- You will see the new Configuration Preset populate under Local presets on device.
- Click upload on the chosen preset.
- The configuration preset will be seen in your Team presets.

- Apply the Configuration Preset:
- For a single device: Choose another device of same model, click the Presets tab, click Apply on the chosen Configuration Preset
- For multiple devices: Choose all devices you want to apply the configuration preset to
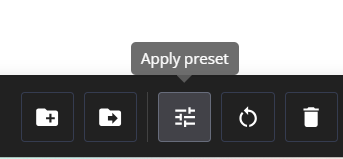
- Click the Configuration Preset button on the bottom right, it looks like options sliders, as seen in the image below:
- Choose the Configuration Preset and click Apply
- Click the Configuration Preset button on the bottom right, it looks like options sliders, as seen in the image below:
Creating and applying Configuration Presets using the Pearl Admin panel
- Log in to the Admin panel
- Navigate to Maintenance on the lower left
- In the Create a Configuration Preset section enter a name for your preset, and check all the boxes next to whatever settings you want to save into your preset.
- We generally recommend deselecting System, Network, and Epiphan Edge if applying the preset to other units.
- After you've chosen your settings click Save, this will save the preset to the unit.
- You can find your newly created preset in the section above and download it.
- Log in to the Admin panel for the other device you wish to configure
- Navigate to Maintenance on the lower left
- In the Import configuration preset section click on Choose file
- In the dialogue box that appears navigate to a Configuration Preset you have downloaded to your computer and click Open.
- Click the Import button
- If the Configuration Preset is uploaded successfully it will appear in the list above alongside the Default Configuration Preset.
- Click the Apply button next to a preset to apply it.
Apply configuration preset with USB
You can also use a Maintenance USB to apply it from the device display, this is not supported on Pearl Nexus as it has no display.
To create a Maintenance USB:
- Start by formatting a USB stick to exFAT, FAT32, ext2, or ext4.
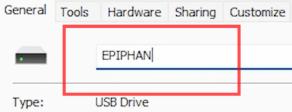
- Insert the USB stick into your computer and rename the USB drive to EPIPHAN (case-sensitive).
- Create a new folder on the USB stick. Name it EPIPHAN (case-sensitive).
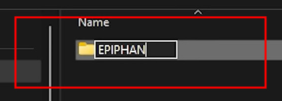
- Copy your Configuration Preset to the EPIPHAN folder on the Maintenance USB.
- Insert the Maintenance USB into your Pearl device.
- Access your Pearl's built-in display.
- Navigate to the Configuration Preset section of the screen
- Tap the Cog in the lower right corner.
- Tap Configuration Presets.
- Select your preset and Apply it. This will overwrite any existing settings on the device with all the settings stored in the preset. The Pearl will warn you of this and you must acknowledge that you want to proceed.
Modify other CMS settings
To modify the CMS integration settings you would log in to your Echo360 admin portal.
Delete your Echo360 integration
- Log in to the Pearl Admin panel via Epiphan Edge, clicking the "Admin login" button
- Navigate to Configuration, then CMS
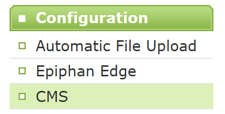
- In the Echo360 click Delete Configuration. This will disconnect the Pearl from Echo360.
- Navigate to the Apps page
- In the Installed section click the Delete button to delete the Echo360 integration.
If you delete the Echo360 integration it will need to be downloaded again before you can connect the Pearl with Echo360. Once disconnected the Pearl will no longer be able to record or stream as part of Echo360 events.
Third party Apps are saved to the Pearl devices SSD or SD Card. If the storage medium is removed, the Echo360 App will disappear from the Admin panel and the device will be offline in Echo360. Reinsert the storage medium to restore functionality.